ITEMS NEEDED:
QTY 1 – Harbor Freight 20ft Telescoping Flag Pole Kit: (Harbor Freight – $89)
https://www.harborfreight.com/20-ft-telescoping-flag-pole-kit-64344.html
QTY 1 – Fernco 1 1/4” x 1 1/2” Flexible PVC Fittings & Connectors (Home Depot – $9)
https://www.homedepot.com/p/Fernco-1-1-2-in-x-1-1-4-in-DWV-Flexible-PVC-Fittings-Connectors-P1056-150-125/100044154
QTY 3 – Self Tapping 3/4” Screws (or similar) – I had these laying around, you can use whatever screw you want, but the self taps make it the easiest for sure.
HOW TO BUILD IT:
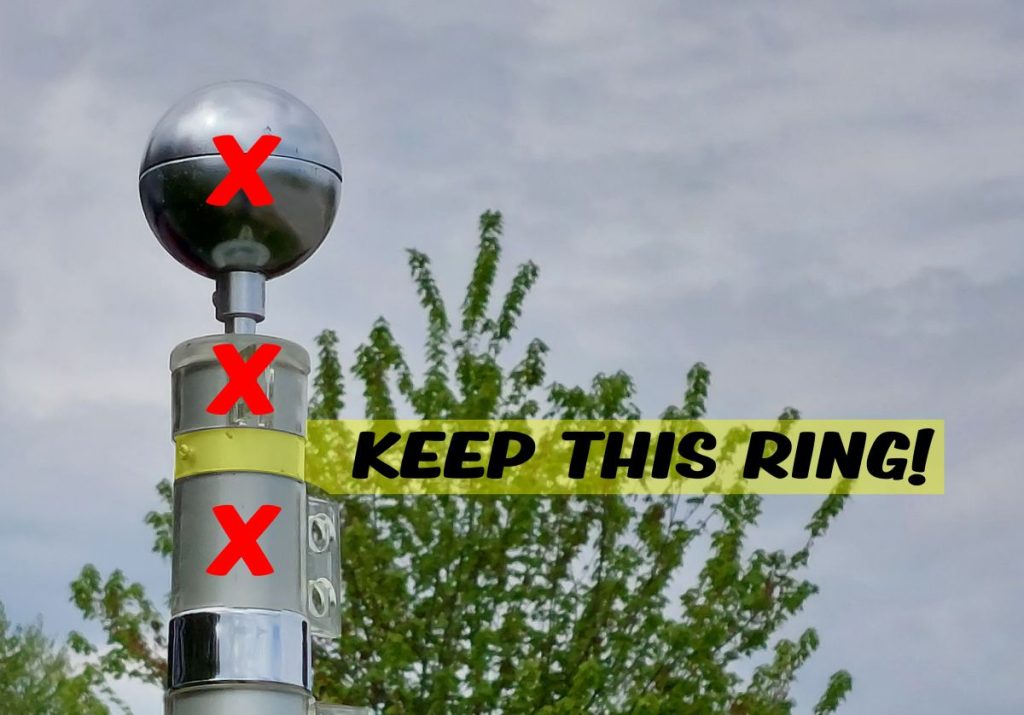
STEP 1. Take out the Flagpole and remove the shiny ball from the top. To remove the ball, remove the 2 screws in the clear ring at the top of the pole. (highlighted yellow in the photo below) You can throw the ball assembly and the other pieces away (items marked with red X in the photo), but KEEP THE RING that was holding the ball inside the pole, you will need this for the next step!

STEP 2. Measure down from the top of the pole 2 1/8” and place the clear ring you saved so that the screws will enter the pole at 2 1/8”. Use 2 of the Self Tapping Screws here not the originals! This keeps the Dishy from going too deep into the pole and possibly scraping / cutting the cord (photos below)
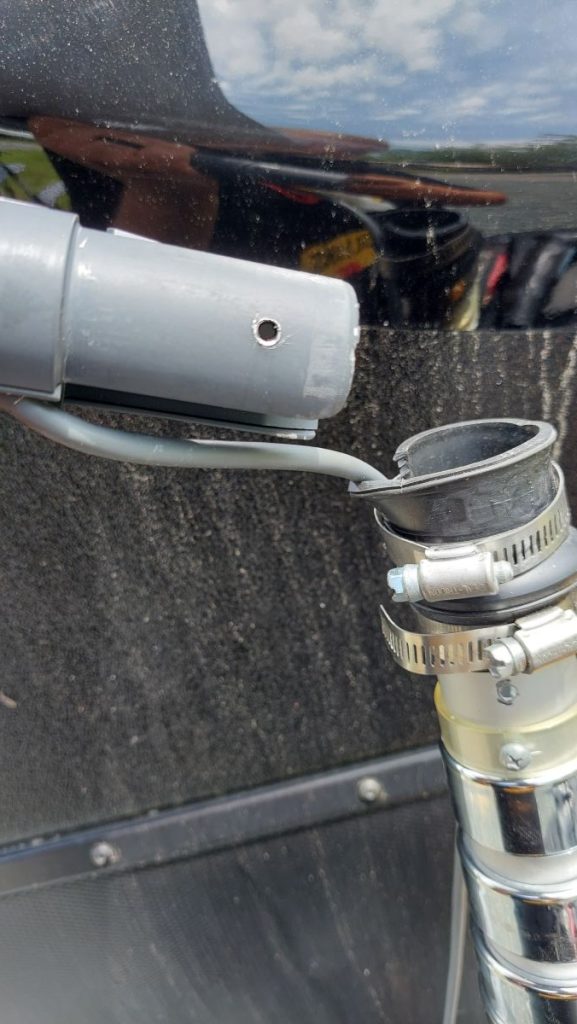
STEP 3. Get your Fernco Coupler and remove the top hose clamp. Drill a 1/4” hole just above the tapered area and then, slice the adapter from there up to the very top. See the photos below. This will allow the cord to pass thru into the adapter and also keeps it off the metal lip of the pole. After cutting, attach the coupler to the top of the pole, making sure the pole is LOWER than the hole you made. This protects the cord from damage.
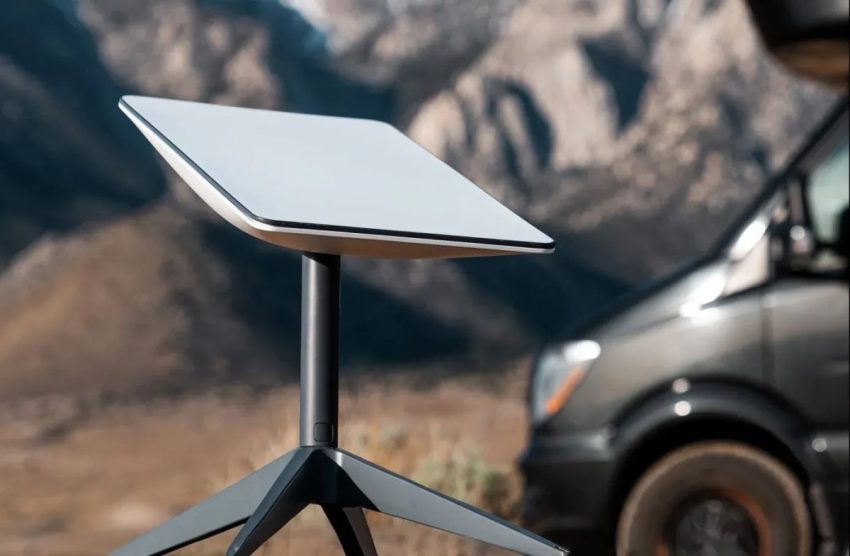
STEP 4. Pass the wire thru the coupler and plug it into your Dishy. Insert the Dishy pole inside the coupler so that it is resting on the screws inside the pole. Now hose clamp the top down tightly.
STEP 5. As an added precaution, and for peace of mind while your Dishy is suspended 20 feet into the air, insert the last Self-Tapping screw into one of the original holes that the clear ring was attached in. Make sure that screw goes INTO the Dishy leg. This hole is low enough that the screw won’t affect the original mounting clip on Dishy’s leg and makes it so that you can still use the original X mount that came with your Starlink. The photo below shows where the screw entered my Dishy leg.

STEP 6. Raise the pole to your desired height and power up your Dishy!
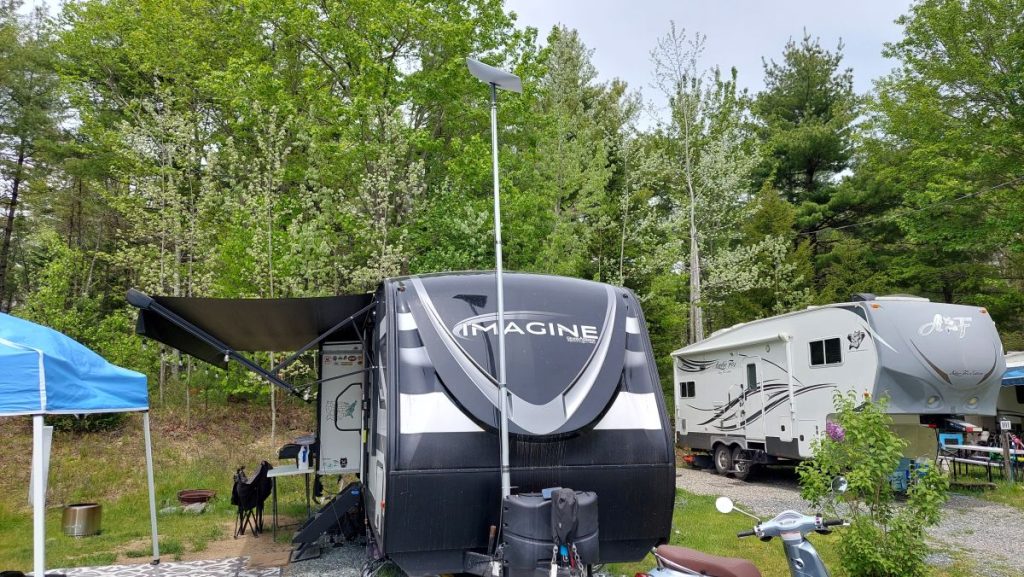
I have had this setup in use DAILY since June of 2023 and my dishy has NEVER fallen out. It even survived many very windy days in Maine during Hurricane Lee and also some pretty brutal wind storms in central Florida.
If you have any questions, feel free to contact me
Professional Graphic/Web Designer of 30+ years.
Currently runs this and another site called StreamBuzz.tv.
Full-time RVer.


